Overlook
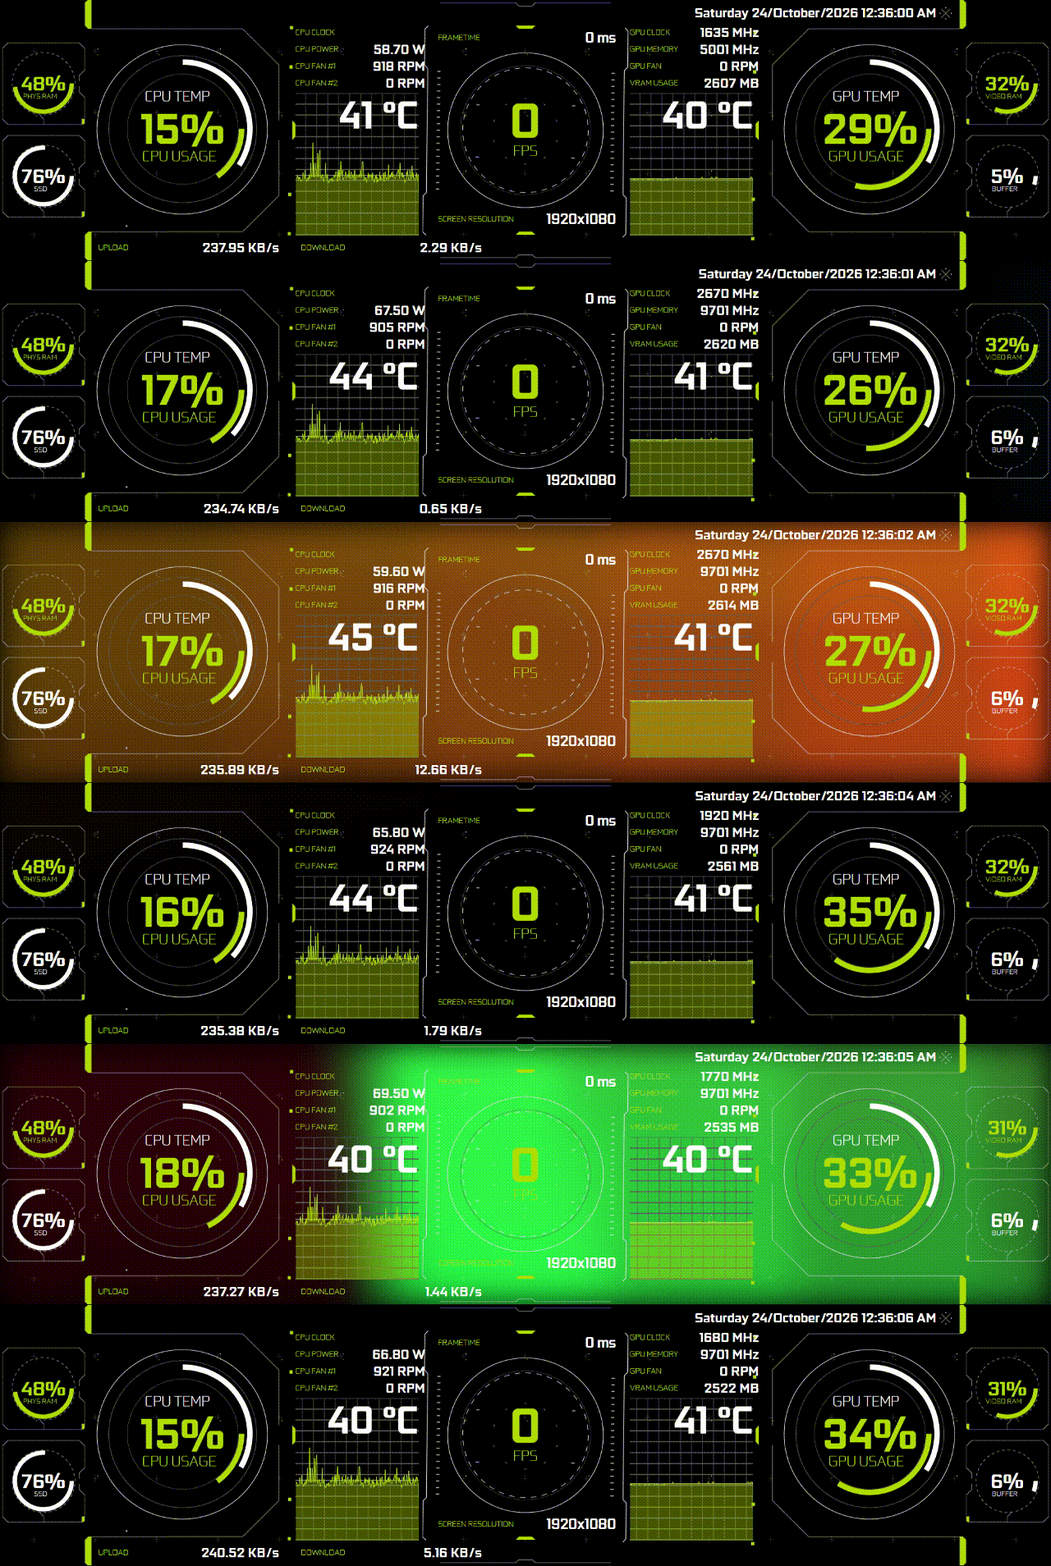
A sensor-panel app for small displays, rewritten for .NET 10 and Avalonia UI supported Windows and Linux.
Description
Overlook
English | 简体中文
A sensor-panel app for small displays, rewritten for .NET 10 and Avalonia UI supports Windows and Linux.
- Sensors are addressed by their LibreHardwareMonitor path, e.g.
ROGPC2/Intel Core i5-14600K/Load/CPU Total, and come from a remote LibreHardwareMonitor (Options > Remote Web Server), defaulthttp://127.0.0.1:8085/data.json. - Linux can also read its own sensors, so no Windows PC is needed. Settings > Sensor source > "Use this computer's own sensors" (on by default on Linux) reads
/procand/sys(CPU load, clocks and temperatures, motherboard fan, voltage and temperature chips, NVMe/SATA drive temperatures, AMD GPUs, memory, network) andnvidia-smifor NVIDIA GPUs. Sensors use the sameComputer/Hardware/Group/Namepaths, so the same sensor picker and themes work. Some values need permission: CPU power (RAPL) is usually root-only and is skipped when unreadable. Installlm-sensorsand runsensors-detectif a motherboard chip is missing. - Themes are JSON (
theme.json+assets/). 1.x XML themes convert with the built-in importer orbigbro-convert.
Run
dotnet run --project src/BigBro.App
Pick a theme, press Show panel. Drag the panel to move it: it stays on screen and snaps flush to screen edges; right-click for options.
Open Settings for the LibreHardwareMonitor address (with a connection test), weather coordinates, language, start-with-system, tray and other options.
Bundled themes
NVIDIA, plus ten more made for the supported display sizes: 1920x480 (8.8"), 800x480 (5") and 1024x600 (7"), each also rotated (480x1920, 480x800, 600x1024). They use portable sensors (@CpuLoadPercent...), so they work on any PC without setup.
| Theme | Size | Look |
|---|---|---|
| Aurora | 1920x480 | glass cards over your RGB lighting (turn on the RGB background) |
| Neon Grid | 1920x480 | synthwave sun and perspective grid |
| Minimal | 480x1920 | black, thin type, five stacked blocks (portrait) |
| Carbon | 1920x480 | carbon fibre with tick-marked orange and blue gauges |
| Pulse | 1920x480 | audio visualizer with CPU, GPU and memory along the top |
| Glacier | 1024x600 | light theme with white cards |
| Terminal | 1024x600 | green phosphor terminal with bar graphs |
| Sunset | 800x480 | warm gradient, big clock, three gauges |
| Gamer HUD | 800x480 | big FPS and frame time (needs MSI Afterburner on Windows) between GPU and CPU gauges |
| Amber LCD | 600x1024 | seven-segment amber digits with unlit-segment ghosts (portrait) |
They are generated by tools/generate_themes.py (Python and Pillow), which is also the easiest way to make your own in code.
Where things are stored
- Your files (settings, your own themes, fonts, languages) are in
%AppData%\Overlookon Windows and~/.config/Overlookon Linux. - Sample themes (NVIDIA) come with the program and are read from the
Themesfolder next to the executable. Overlook never copies them into your folder, so deleting one there removes it for good. - Themes from both places show up in the list. If both have a theme with the same name, yours is used.
- Editing a sample theme and saving puts the edited copy in your own
Themesfolder, and the original stays untouched. - Portable Windows zip: it contains a
portable.txtfile, so everything is kept in aDatafolder beside the program instead of%AppData%. Deleteportable.txtto use%AppData%again.
Downloads
Theme editor
Theme editor... on the main window opens it. Click or drag elements on the canvas (handles resize), edit every property in the side panel,
the File / Edit / Add / View / Tools menus: add, duplicate, delete and reorder elements, nest elements under a parent, snap to a grid (toolbar: Snap to grid / Show grid / size), undo/redo (Ctrl+Z / Ctrl+Y), save (Ctrl+S) or save as a copy.
It previews with live data when the panel is connected, otherwise with a bundled sample PC.
Importing 1.x themes lives here (File menu: Import 1.x themes / Import a 1.x Themes folder). 1.x themes name hardware sensors ("CPU load"), so the import shows a window where you confirm or change the LibreHardwareMonitor sensor for each one; suggestions come from your PC when it can be reached. From a terminal:
dotnet run --project src/BigBro.ThemeConverter -- "<old>\Themes" -o Themes --sensors http://192.168.0.8:8085/data.json
--sensors (a data.json file or URL of your PC) binds the old sensors to the matching ones there; without it they are left unbound.
Fonts a theme needs must be installed or placed in the Fonts folder (the importer copies them from a 1.x install when it finds one).
Format details: docs/theme-format.md.
Extra requirements
- Audio visualizer - Windows: nothing. Linux:
parec(packagepulseaudio-utils, orpipewire-pulse). - YouTube element - Windows: WebView2 runtime. Linux: WebKitGTK (
libwebkit2gtk-4.1). The video must allow embedding. The player is hosted on a tiny local web server (127.0.0.1) because YouTube rejects embeds without a referrer. - FPS / frametime - MSI Afterburner + RivaTuner running on the same Windows PC as Overlook, with the Framerate counter enabled.
Command-line helpers
Overlook --render <theme folder> --out shot.png --sensors data.json [--samples 60] [--audio-demo] [--wait 500]
Overlook --screenshot main|settings|editor --out shot.png [--theme NAME] [--select ELEMENT] [--data <data dir>]
Limits
- Date/time, ping, uptime, drive sizes, screen resolution, refresh rate and FPS describe the machine the app runs on, not the monitored PC.
- RAM speed is derived from the DIMMs' SPD timings. Display refresh rate on Linux needs
xrandr. - YouTube players are native web views, so they always sit on top of the drawn elements.
Prerequisites
Releases & Changelogs 1
Download (9 files)
Full Changelog: https://github.com/qiangqiang101/Overlook/commits/2.0-rc1
Details
- Category
- Tools
- Latest version
- 2.0-rc1
- Total downloads
- 0
- Page views
- 4
- First released
- April 7, 2026
- Last updated
- November 19, 2026
Comments 0
No comments yet. Be the first!
Add a YouTube video
Made a showcase or tutorial for this mod? Send the link. It appears in the gallery once it has been approved.


